How To: Set Up Your Longboard
For those of you who maybe just got a new longboard and are anxiously waiting to set it up, or just have a few simple questions about putting together your board, this is for you. Today we will go through step by step with pictures, covering every aspect of how to put together a longboard. For the demonstration, we will be setting up:
Deck: Rayne Demonseed
Trucks: Paris Trucks
Wheels: Orangatang Kegels 80mm
Bearings: Zealous Bearings
Griptape: Mob Grip
Hardware: Mini Logo Hardware
Step One: Tools


You are going to want to have your deck, grip, trucks, wheels, bearings, hardware, and all the tools you need. For tools, we recommend a having razor blade, something to file down the edge before cutting (like a screw driver), your T-tool, a small poker, and a powerdrill. At this point you will need to decide whether or not you want to grip the board from nose to tail or maybe leave some of the board exposed. For this board we’re going to grip the whole surface, so we cut the grip to about 46 inches to account for the drops in the board and a little room for error. We rarely make errors here at Motion, so the extra length is purely for demonstration purposes.
Step Two: Gripping

Cut Grip tape slightly longer than the overall deck length.
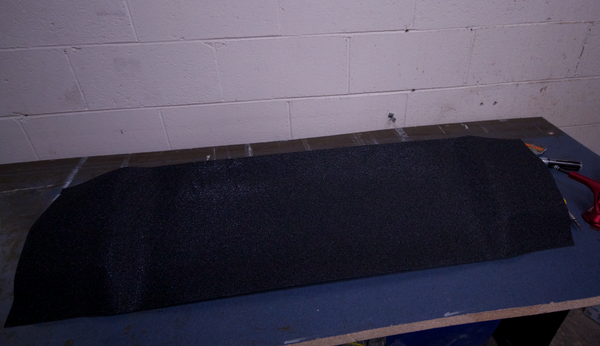
Apply Griptape to deck, and roll griptape from the center out.
Make Diagonal cuts in the shoulders of the board to make the rasping process easier.
Once you have removed the backing from the grip tape you can lay it down on the board. If you’re having trouble getting it to stick to the board you can use a heat gun or a hair dryer and apply some heat. This will heat up the adhesive and help it bind to the deck. Afterwards, take a wheel and roll it over the grip to help it better stick to the board. Once the grip is adhered to the board and before you start rasping the edges, you want to cut off the excess grip around the edges. This is most important if your board looks like the Rayne Demonseed with wheel cutouts, as the grip will not get rasped effectively near the cutouts. Now you can use a screw driver and run it back and forth around the edge of the board. This will help score the grip tape, making it easier to cut in the next step.
Step Three: Cutting Grip

Use the Screwdriver to rasp around the edges of the deck to make the cutting process smoother and clean.

Using the Razor Blade cut around the rasped edges tilting the blade into the deck and backwards.


After Gripping the Perimeter of the board, it should look like this.
After scoring the grip around the entire board grab your razor blade and slowly run it up the side of the board cutting the grip. It is best to keep the blade around a 45° angle during the cut, as it will give the grip a bit of a 'border' and it's not as likely to dig into the wood. This is depicted in the second picture above. Some people like a steeper angle, verging on vertical. Depending on what the board is being used for, sometimes I like to not cut the grip near my rear foot on the toe side, and instead wrap it around and cut it just so there isn't any grip facing the ground. This is depicted in the third picture above (If you look at the third picture closer, you will notice it's a different board. Purely for demonstration purposes.)
Step Four: Quality Control

Your board is now fully gripped, check around it for any small pieces of grip you may have missed. If you wish, you can run the screwdriver or blade along the edge again just to smooth it out, but that is not entirely necessary. At this point you’re ready to continue assembling your board.
Step Four and a Half: Drop Through Mounting
If your board has drop through mounting like the Rayne Demonseed, then there's another step you have to do to remove the grip from the holes. Start by turning the deck over, and cutting a cross to allow the grip to conform better to the wood, kind of like what we did in step 2. Then get the screwdriver (or your rasping tool of choice) and rasp the inside edge of the drop through mounts. The grip might 'cut itself' during this part, don't worry about it, as you're cutting it away anyway. When the rasping is done, get that handy blade and use it! For this cut, most like to hold the blade almost vertical to make it look like a clean transition between the grip and the deck. (Skip to Step 5 if you do not have a drop-through)

Cut a 't' shaped relief cut in the drop-through hole. 
Use the Phillips Head Screwdriver to rasp the inside radius of the Drop-Through.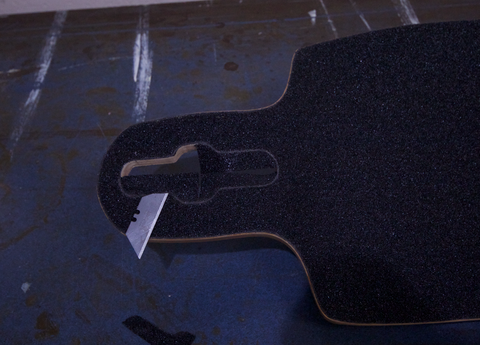
Use Razor Blade to Cut out Drop-Through, be careful.
When it is fully cut out it should look like this.
Step Five: Truck Assembly
Gather all of your parts to complete your setup and the the necessary tools to finish the process. If you are mounting your trucks on a drop through board, you need to separate the two parts of the trucks, the baseplates and the hangers, before you can mount them. Look at the pictures and use your skate tool to achieve the same result.
For the Next process you will need the hardware, trucks, screwdriver, and T-tool.
Use the T-Tool to undo the Kingpin Nut.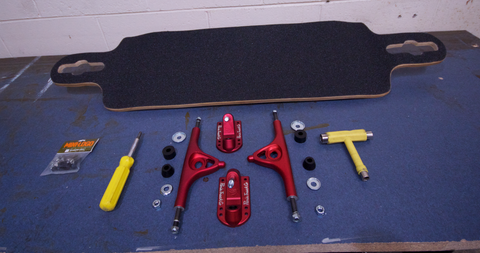
Pull Trucks apart and keep all bushings, washers, and components neatly organized.
Step Six: Mounting Baseplates
Place your hardware on the board. On a top mount this would be on top of the board or on a drop through between the nut and the board on the bottom of the deck, as exemplified in these pictures. Make sure people see you doing this as it makes you look really smart. (Better picture below)
Use the Hardware through the mounting holes to mark the holes through the griptape.
Using the Marks from the previous steps, line up the truck, and push the hardware through the grip.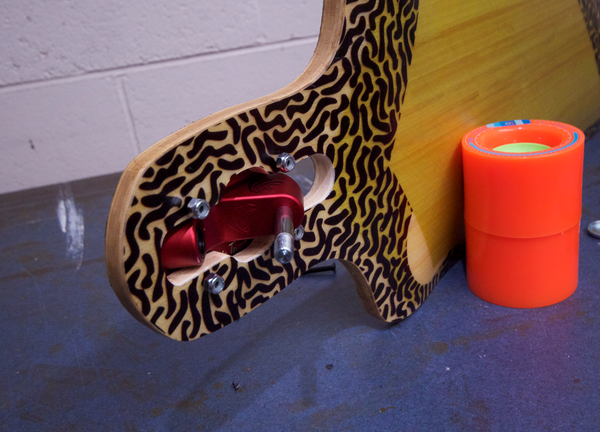
Hand Tighten the Nuts onto the Bolts.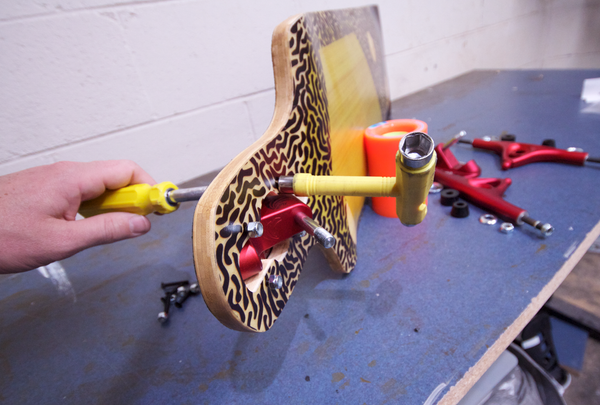
Use the Screwdriver and T-tool to tighten the bolts and nuts till they securely hold the baseplates to the deck.
Make sure that all nuts and bolts are tight before moving onto step 7.
Step Seven: Mounting the Hangers
Once the baseplates are secure to the board, if you're mounting a drop-through, you need to re-attach the hangers back to the board.
Starting with just the baseplate...
Stack the Large Flat Washer and Barrel bushing onto the kingpin.
Add the hanger over the kingpin and push it down on top of the barrel bushing.
Next add the Cone bushing to the kingpin with the wider side contacting the hanger.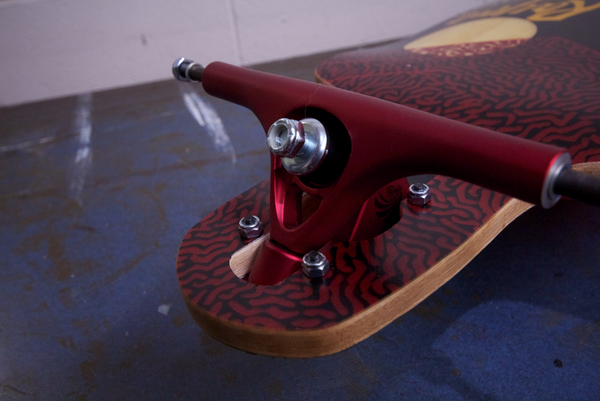
Next, add the smaller cupped washer and kingpin nut to the kingpin.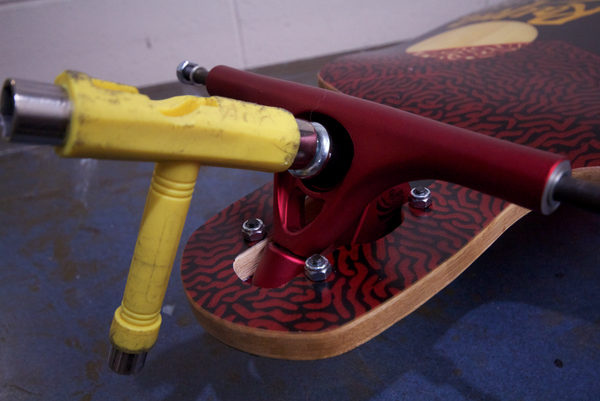
Use the T-tool to tighten the bushings until the Kingpin Nut is flush with the top of the Kingpin. 
Once assembled properly, it should look like this.
Step Eight: Wheels andBearings
At this point your trucks are all tightened, and you’re ready to put the wheels on. Take off the axle nut, then grab your bearings and place two of them on the axle with the outer part of both bearings (the side with the shield on it) facing inward towards the truck, and the spacer (if you have them) between the bearings. The bearings we're using have built-in spacers, and will make the next step incredibly easy. Check out Zealous Bearings for our shop favorite bearings for longboards.
Take Axle Nuts and Speed Rings off of Hangers, and place 2 Zealous Bearings on each axle with the extra spacer pointed to the outside of the hanger.
Grab 2 wheels, in this case the Orangatang Kegel, and with the wheel graphic pointed to the inside of the truck push the wheel against the bearings until 1 bearing pops into the bearings seat.
Now pull the wheels away from the hanger and then flip each wheel around so the graphics are now facing out and push the wheels against the remaining bearing that is still on the axle.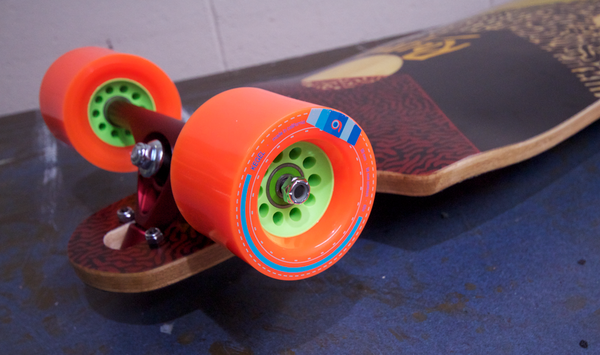
Now hand tighten 1 axle nut per side onto the axle. (with Zealous bearings there is no need for speedrings, as the bearings are built with extended inner bearings races in order to compensate for this measurement difference.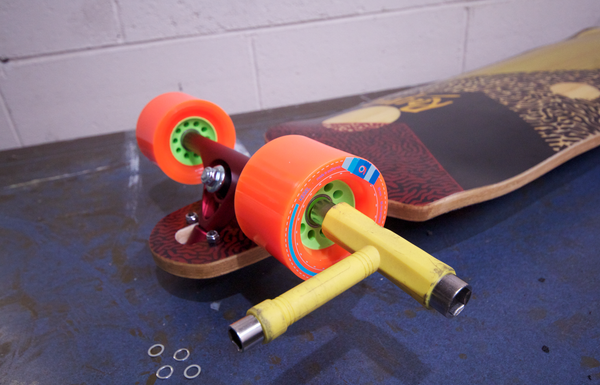
Now, use the T-tool to tighten the axle nut all the way into the bearing, while still allowing the bearing to spin freely. 
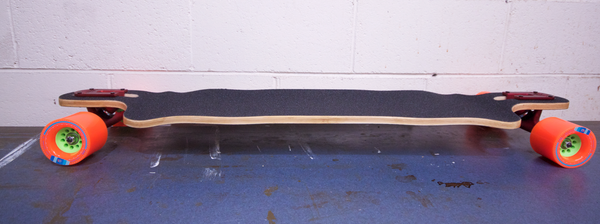
Once fully assembled it should look like this.
Step Nine: Wheelbite?
At this point your board is fully assembled and you’re going to want to check a few things: Stand on the board and do a wheel bite check, done by putting all your weight onto one side of the board and making sure the wheels don't touch the wood. It is not a bad idea to turn harder than you ever would when you’re actually riding just to ensure you won’t experience wheelbite at anytime when riding. If two wheels come off the ground and you're still not getting wheelbite, then there's a very good chance you won't get it when you're moving either. If you are getting wheelbite it may be a good time to look at aftermarket bushings in order to better tune the way your truck turns. Also, check all your nuts and bolts to make sure they are on nice and tight.
The Demonseed when setup with 50º Paris Trucks and Orangatang Kegels is a stable and deep turning board that is wheelbite free, which makes it one of the most comfortable board that we can assemble, and is one of our best selling boards for nearly a decade.
Step Ten: Swag
Whatever companies you like to support, slap a couple stickers on your board and make it your own. If you don't have any cool decals, slap on a Motion Boardshop Sticker, as it will look great and add a fictitious, but scientific 5 MPH!!!

Your board is fully setup and ready to ride! Look at it, head out, and shred! After you go out and ride your new board we recommended just doing a once over and checking to make sure everything is still tight as it should be. If you have any questions about setting up a board or anything else we covered today, feel free to give us a call at (206) 372-5268, or email us at info@motionboardshop.com and we would be happy to help you out. Skate safe and have a good one!